
New article
Recently updated
Creating Child Actions

Who is this article for?Users working with Action items within the system.
Module access is required.
When working with large tasks, you may need input from more than one person in order to complete it. For ease of management, you can create Child Actions, or sub-tasks, within Action items, or tasks, and assign them to the responsible parties within the system.
This functionality is available in all modules that use Action items.
This article shows you how you can create and manage Child Actions in the Calendar module, but you can replicate the same steps in other modules.
1. Creating Child Actions
To create a Child Action:
- Access the required module.
- Open an Action.
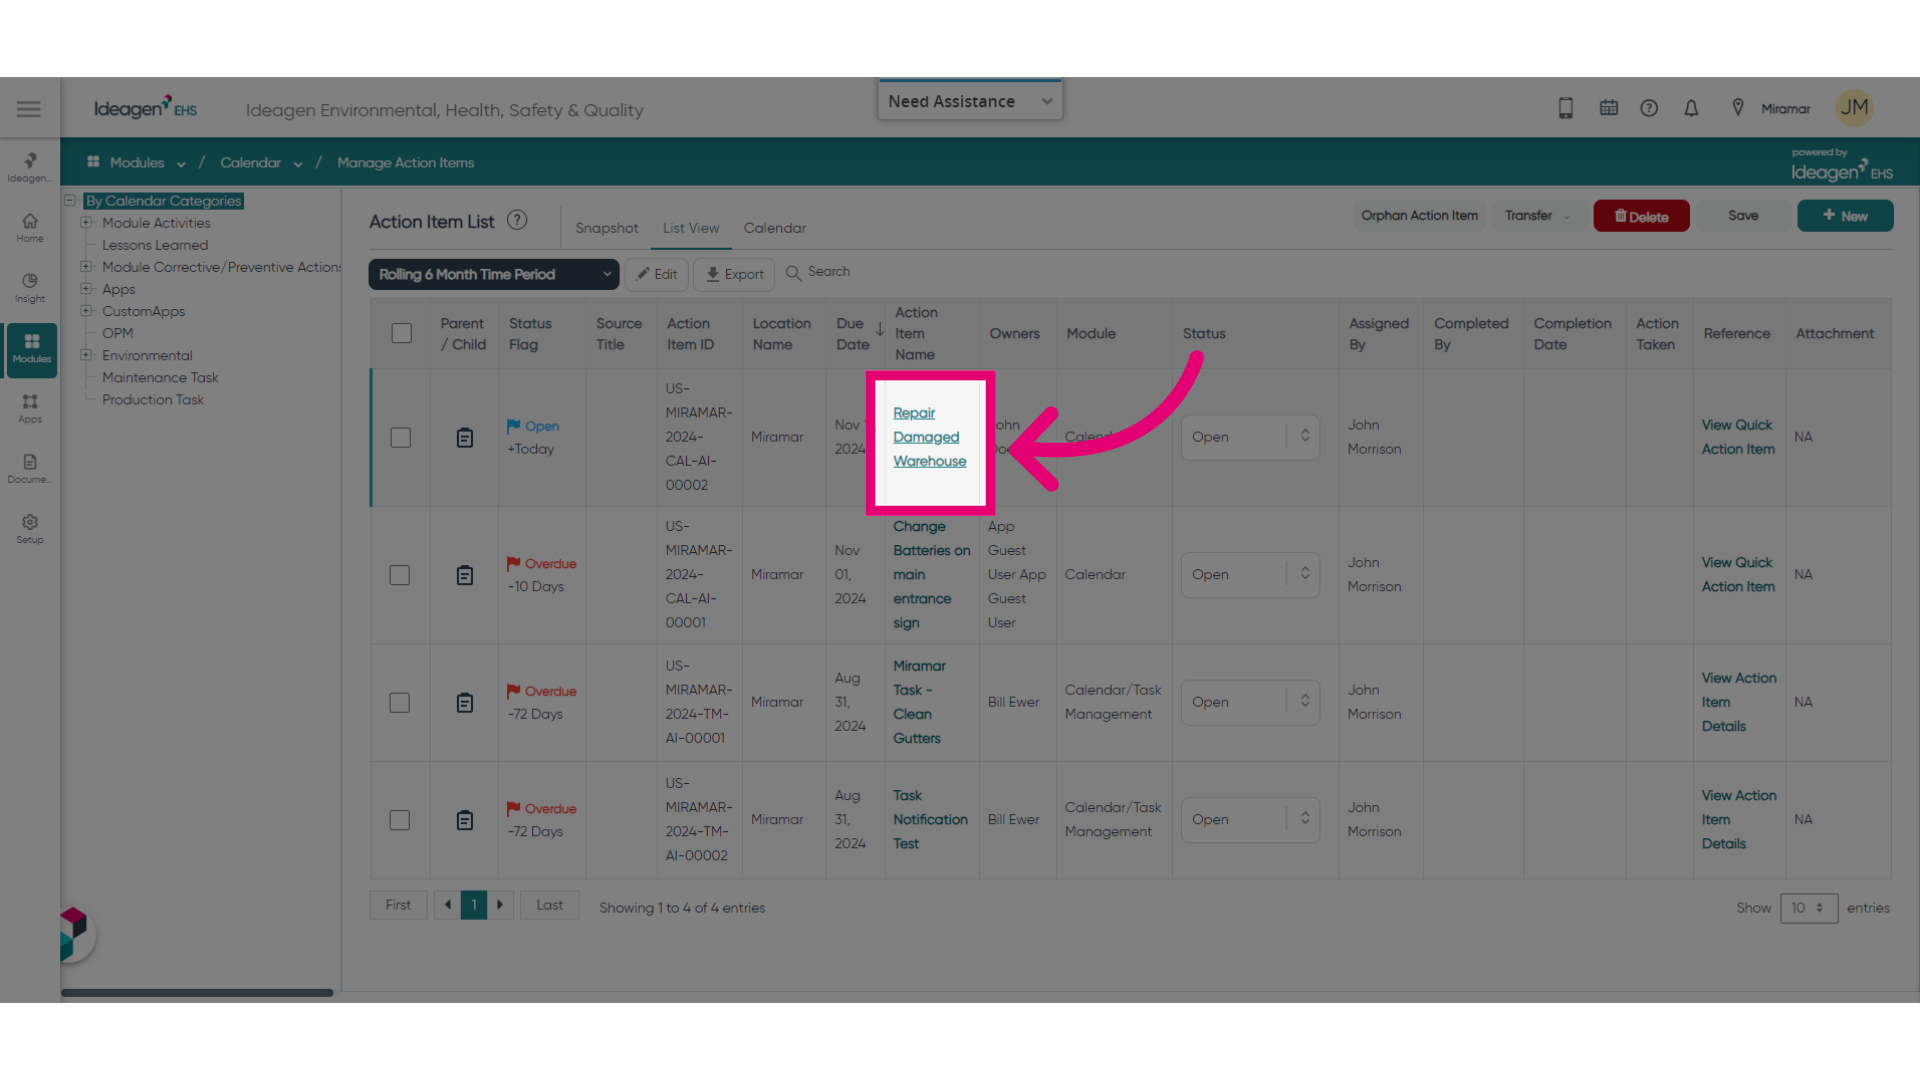
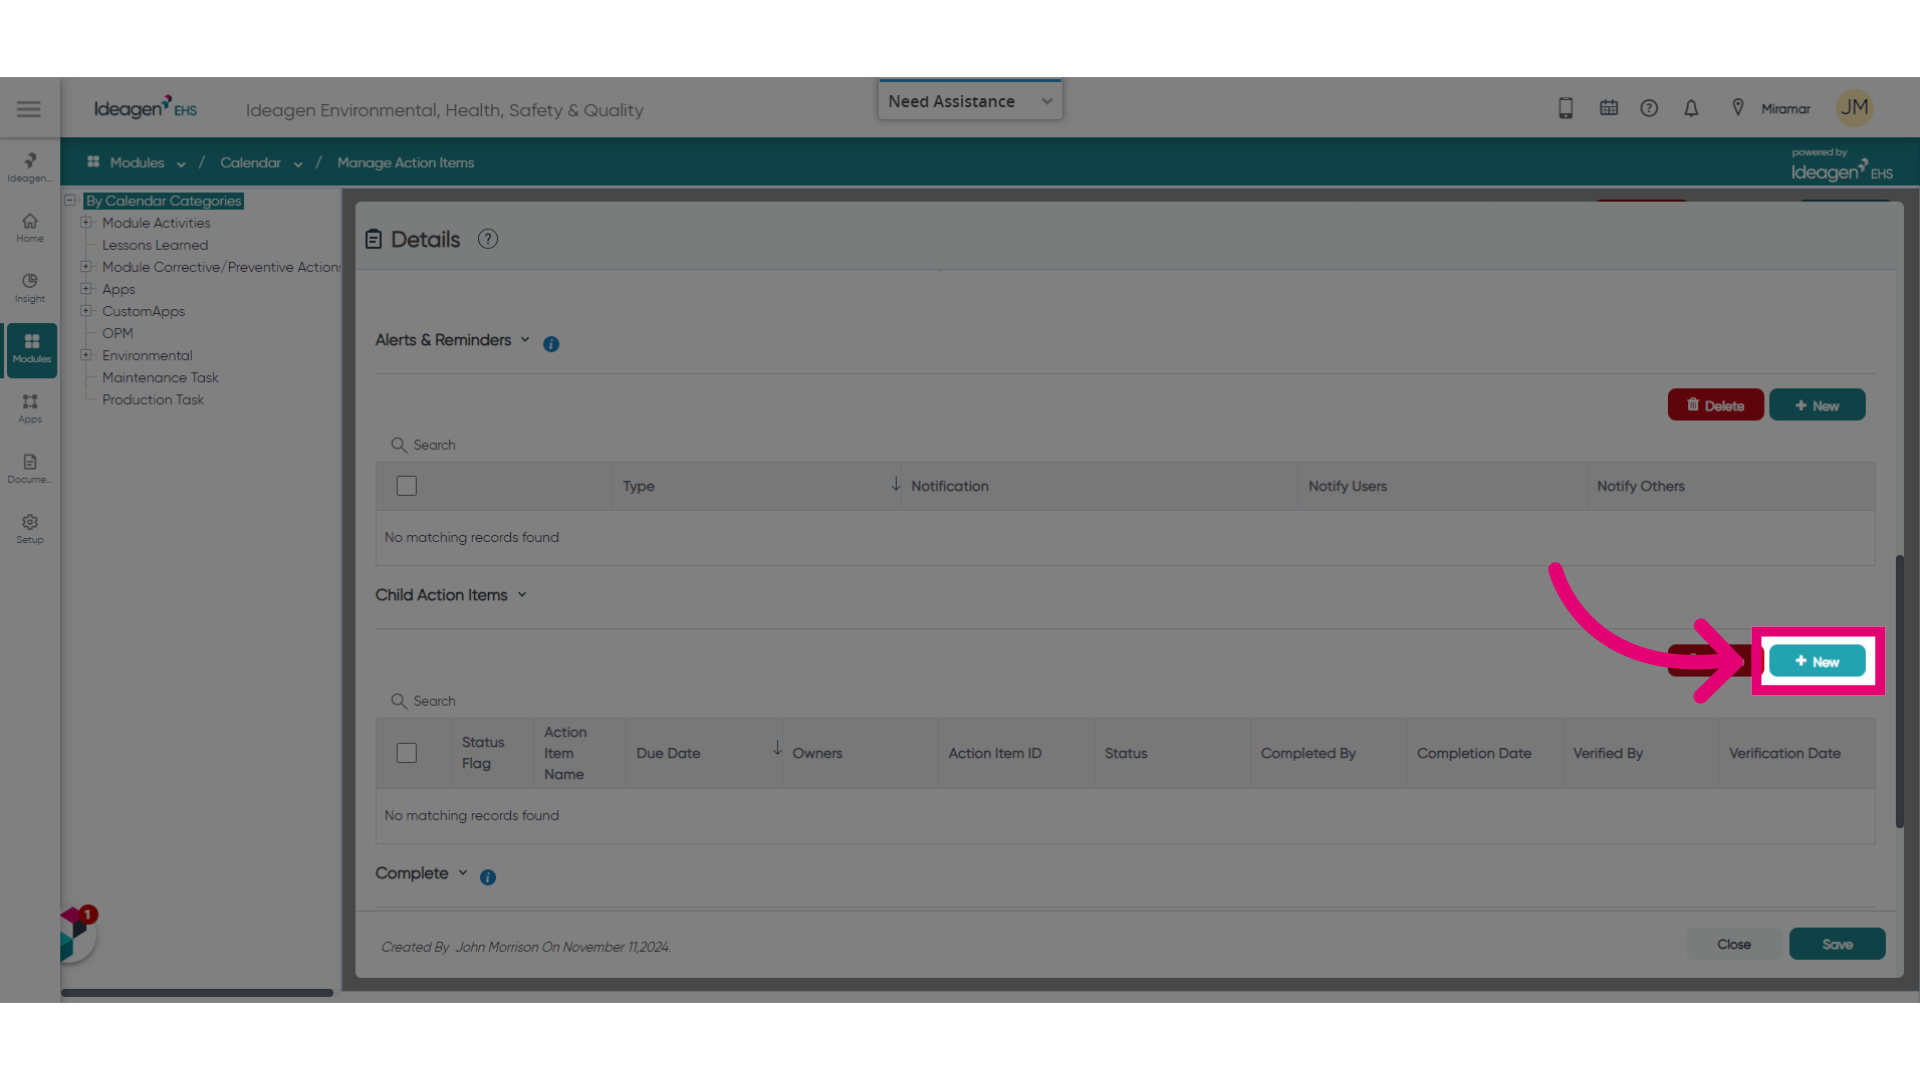
- Scroll down to the Child Action Items section.
- Click + New.
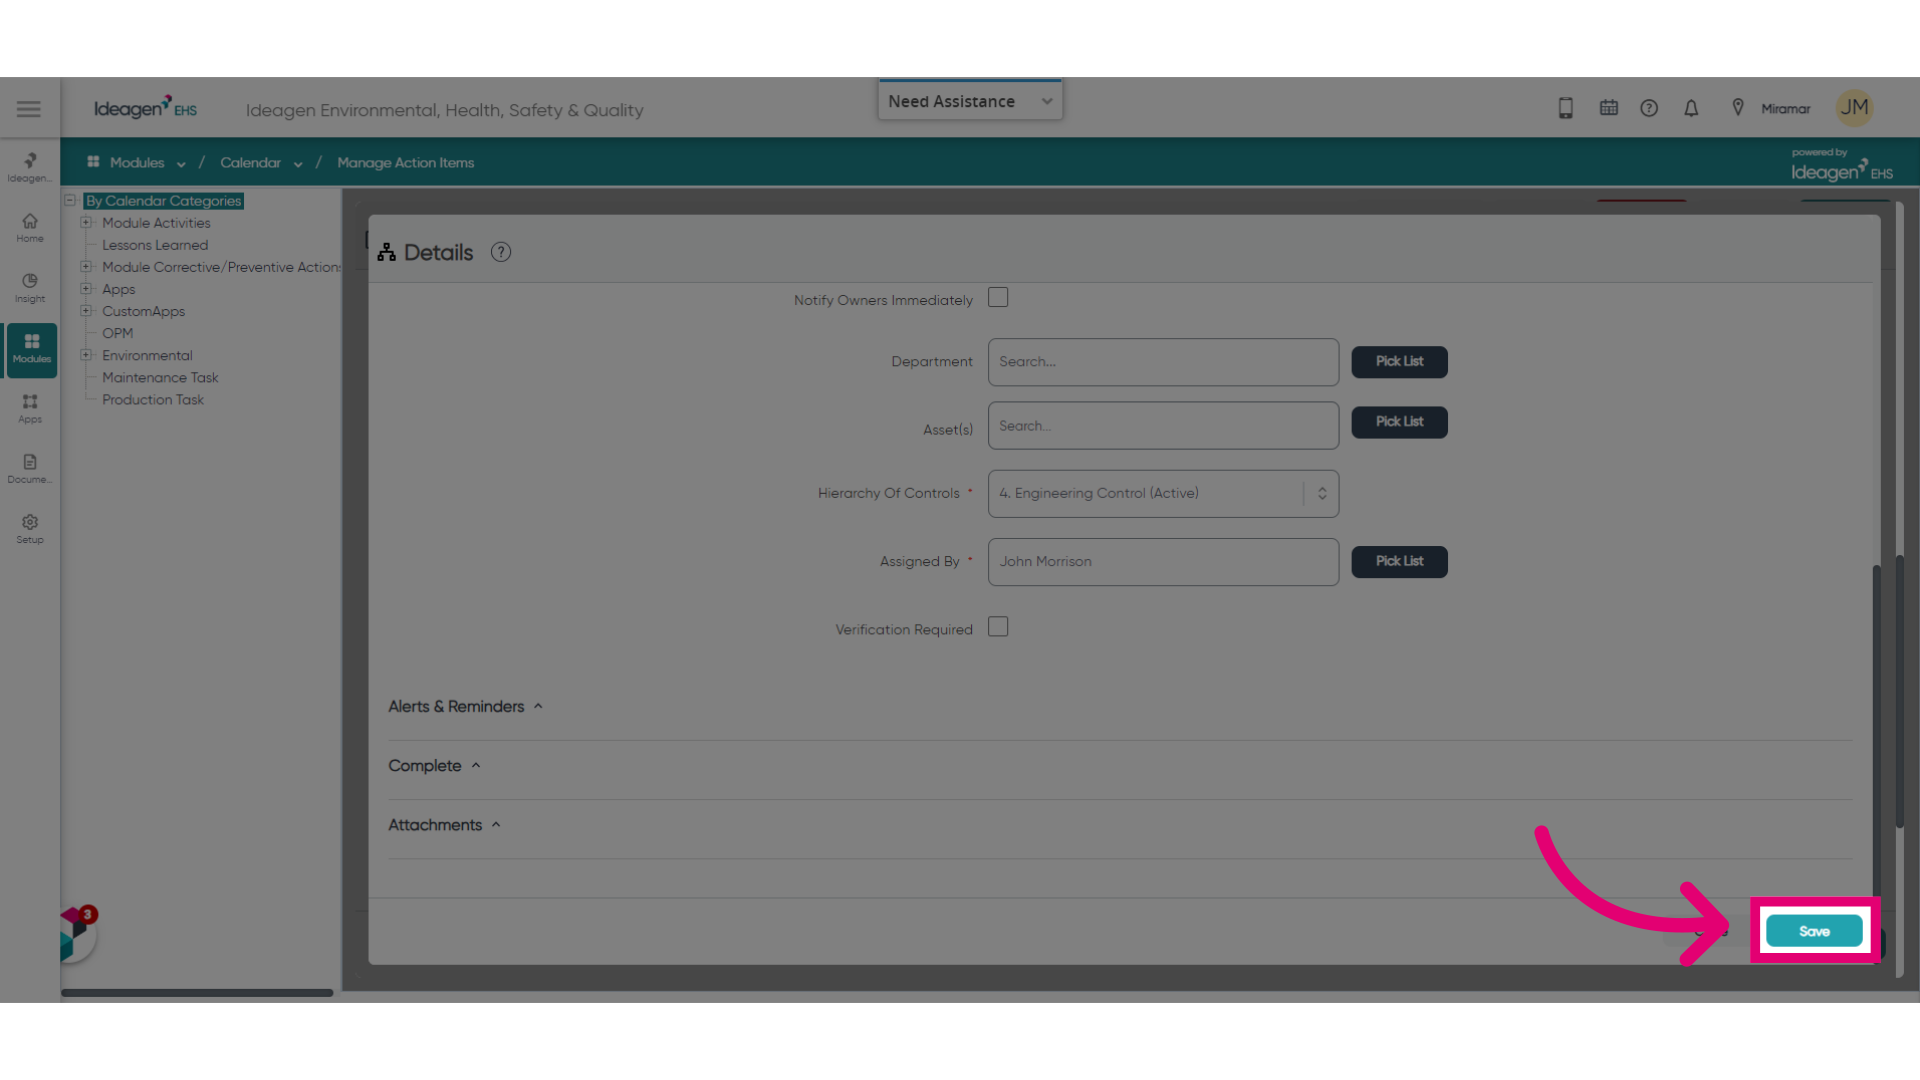
- Fill out required details.
Some fields are read-only and display information related to the Parent Action. - Click Save.
Getting an error when saving?
Child Action must have a Due Date that's later than that of the Parent Action.
Your newly created sub-task will be displayed in the Child Action Items section of the Parent Action.
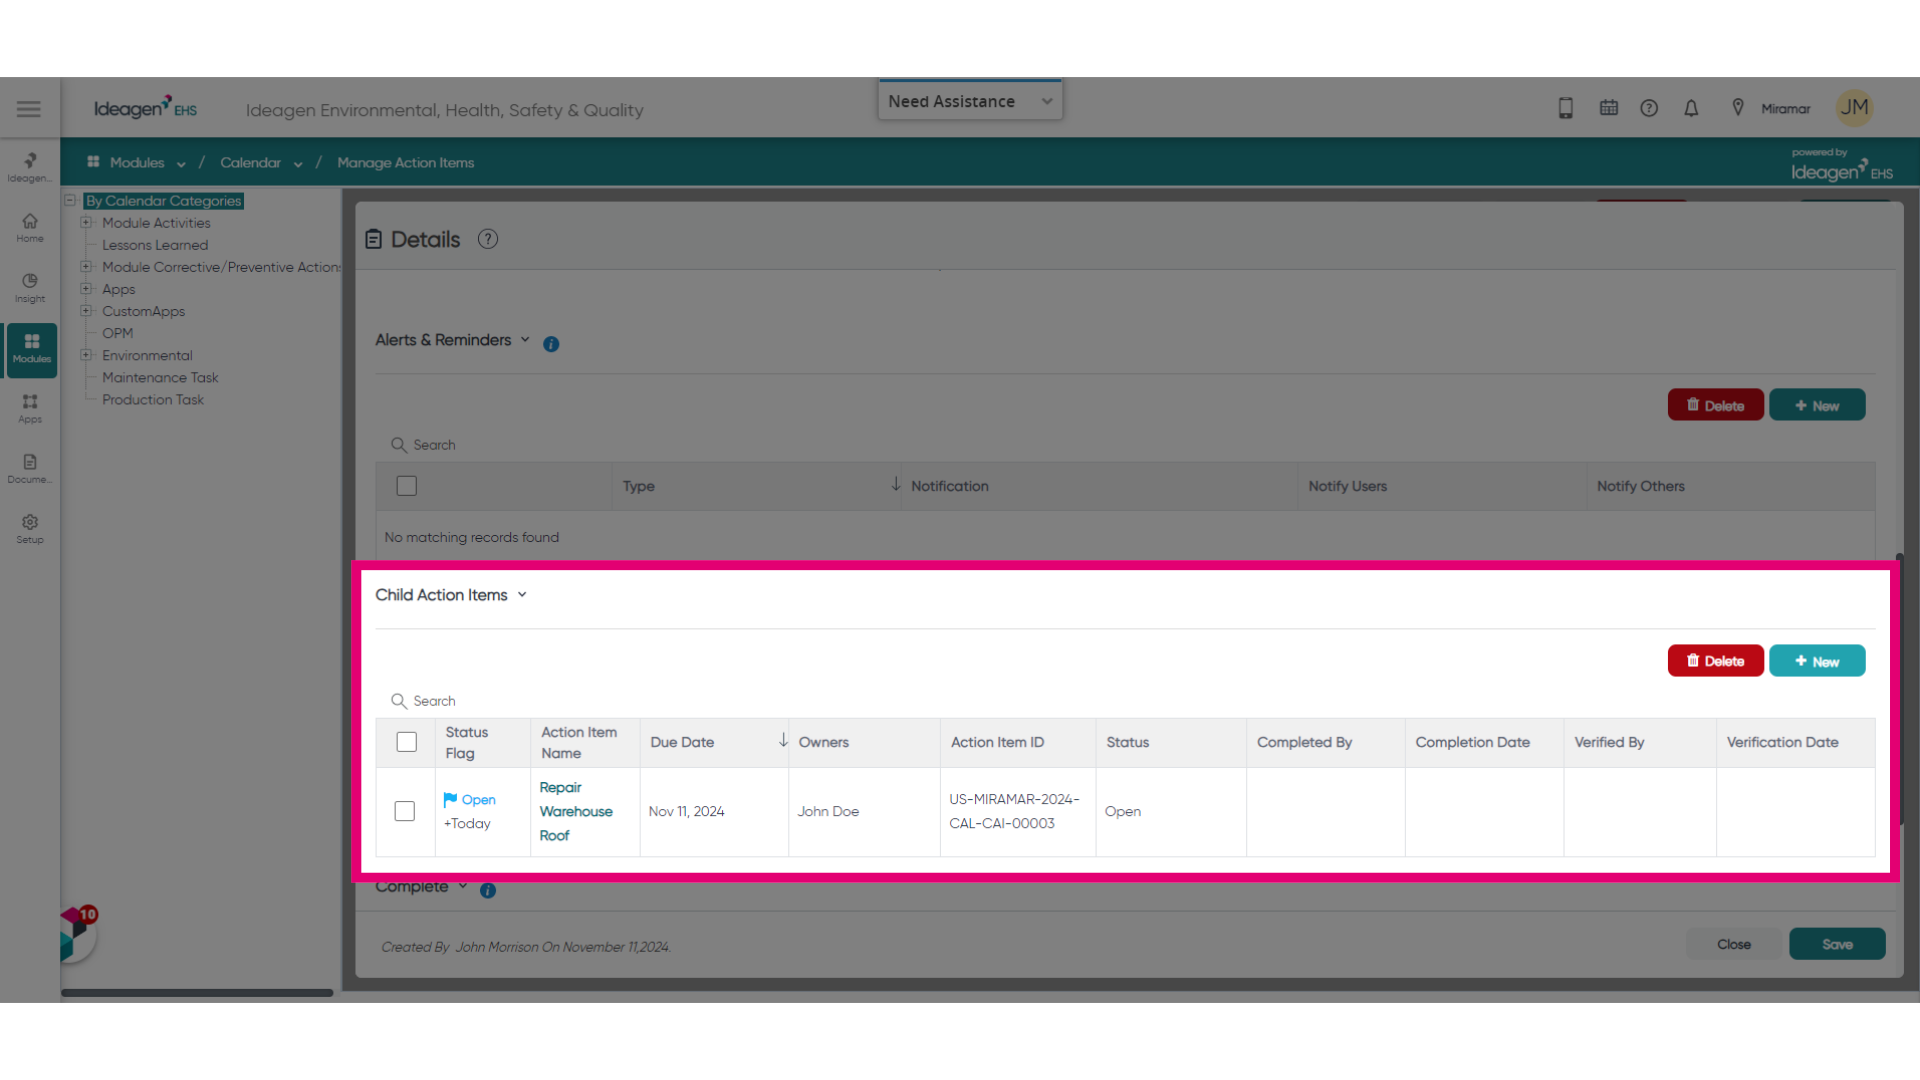
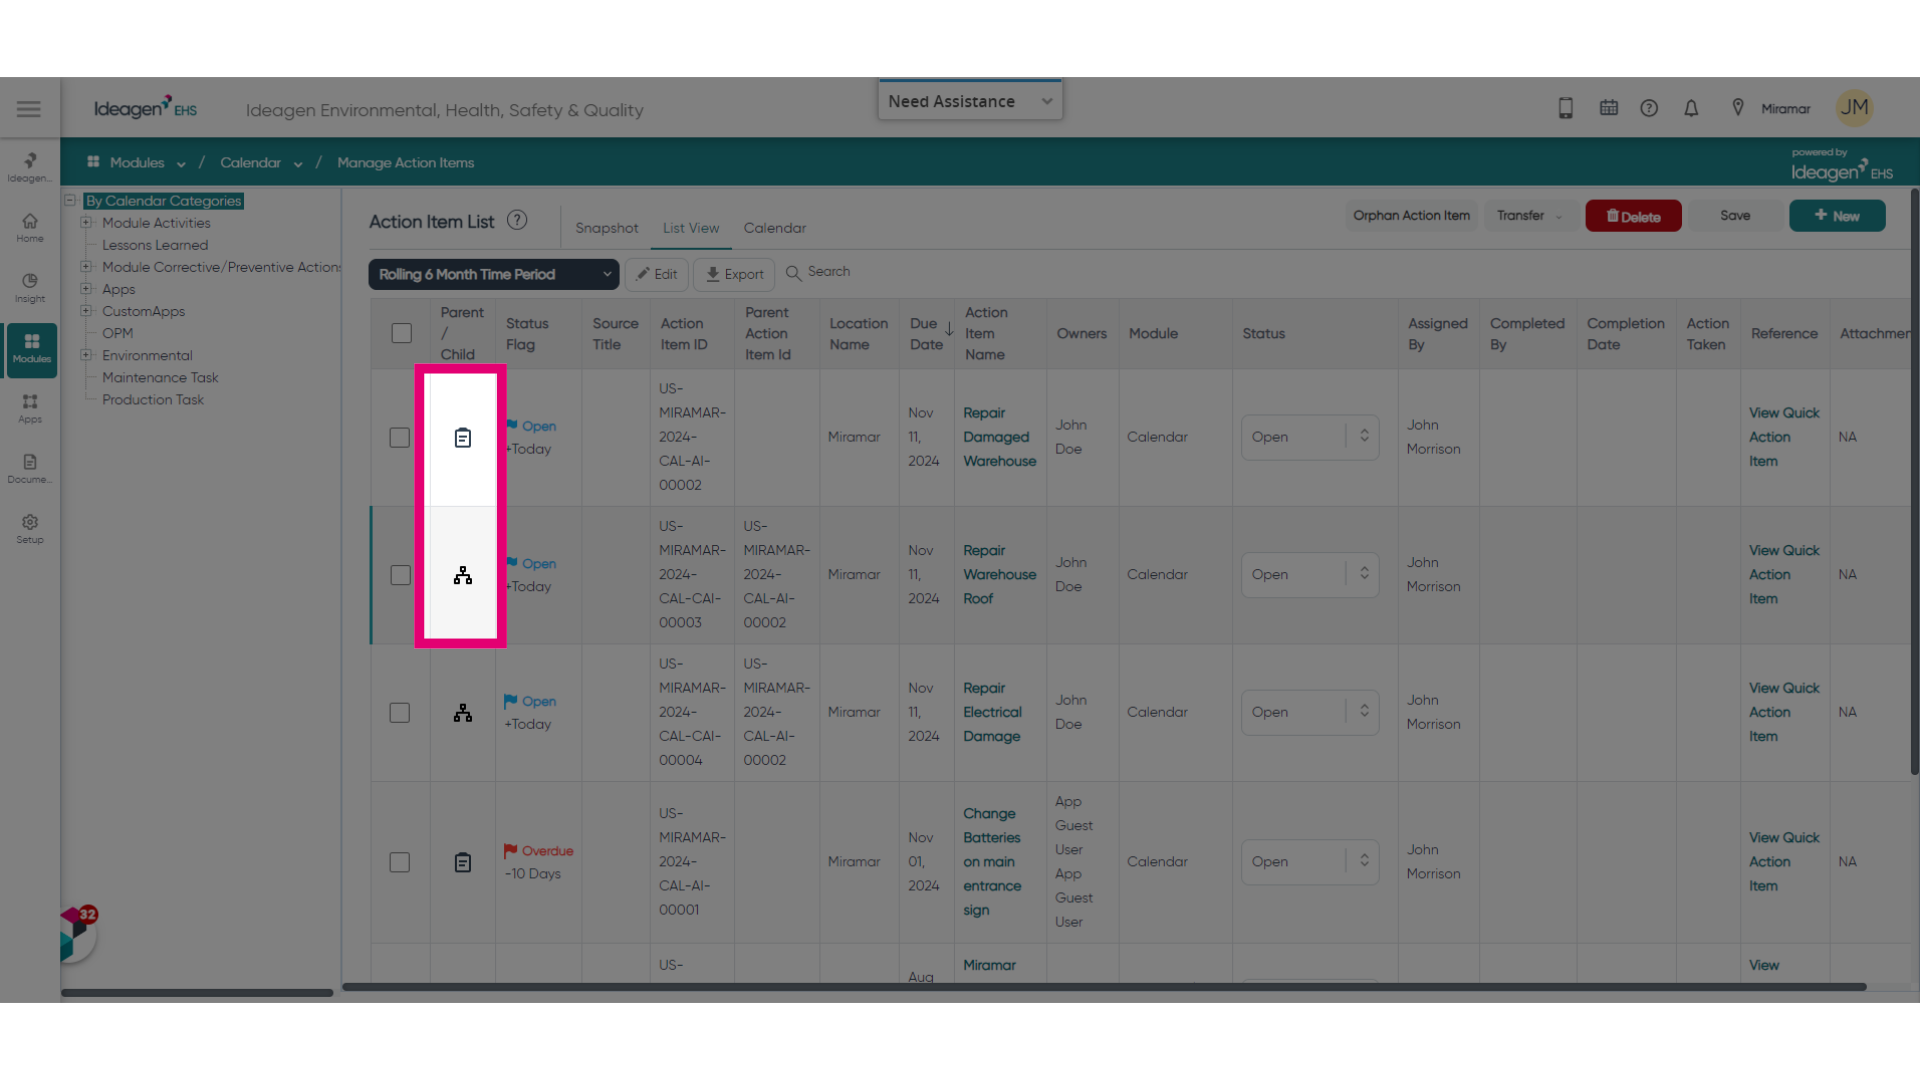
In the list view, Parent Actions are indicated by the Clipboard icon, while Child Actions are indicated by the Organisation icon. Parent Action items cannot be closed until all associated Child Action items have been closed.
Permissions for Action items remain the same for both Parent and Child items.
2. Adding Parent Action ID column
For ease of management, you can also add the Parent Action Item ID to the column choices.
To add the column:
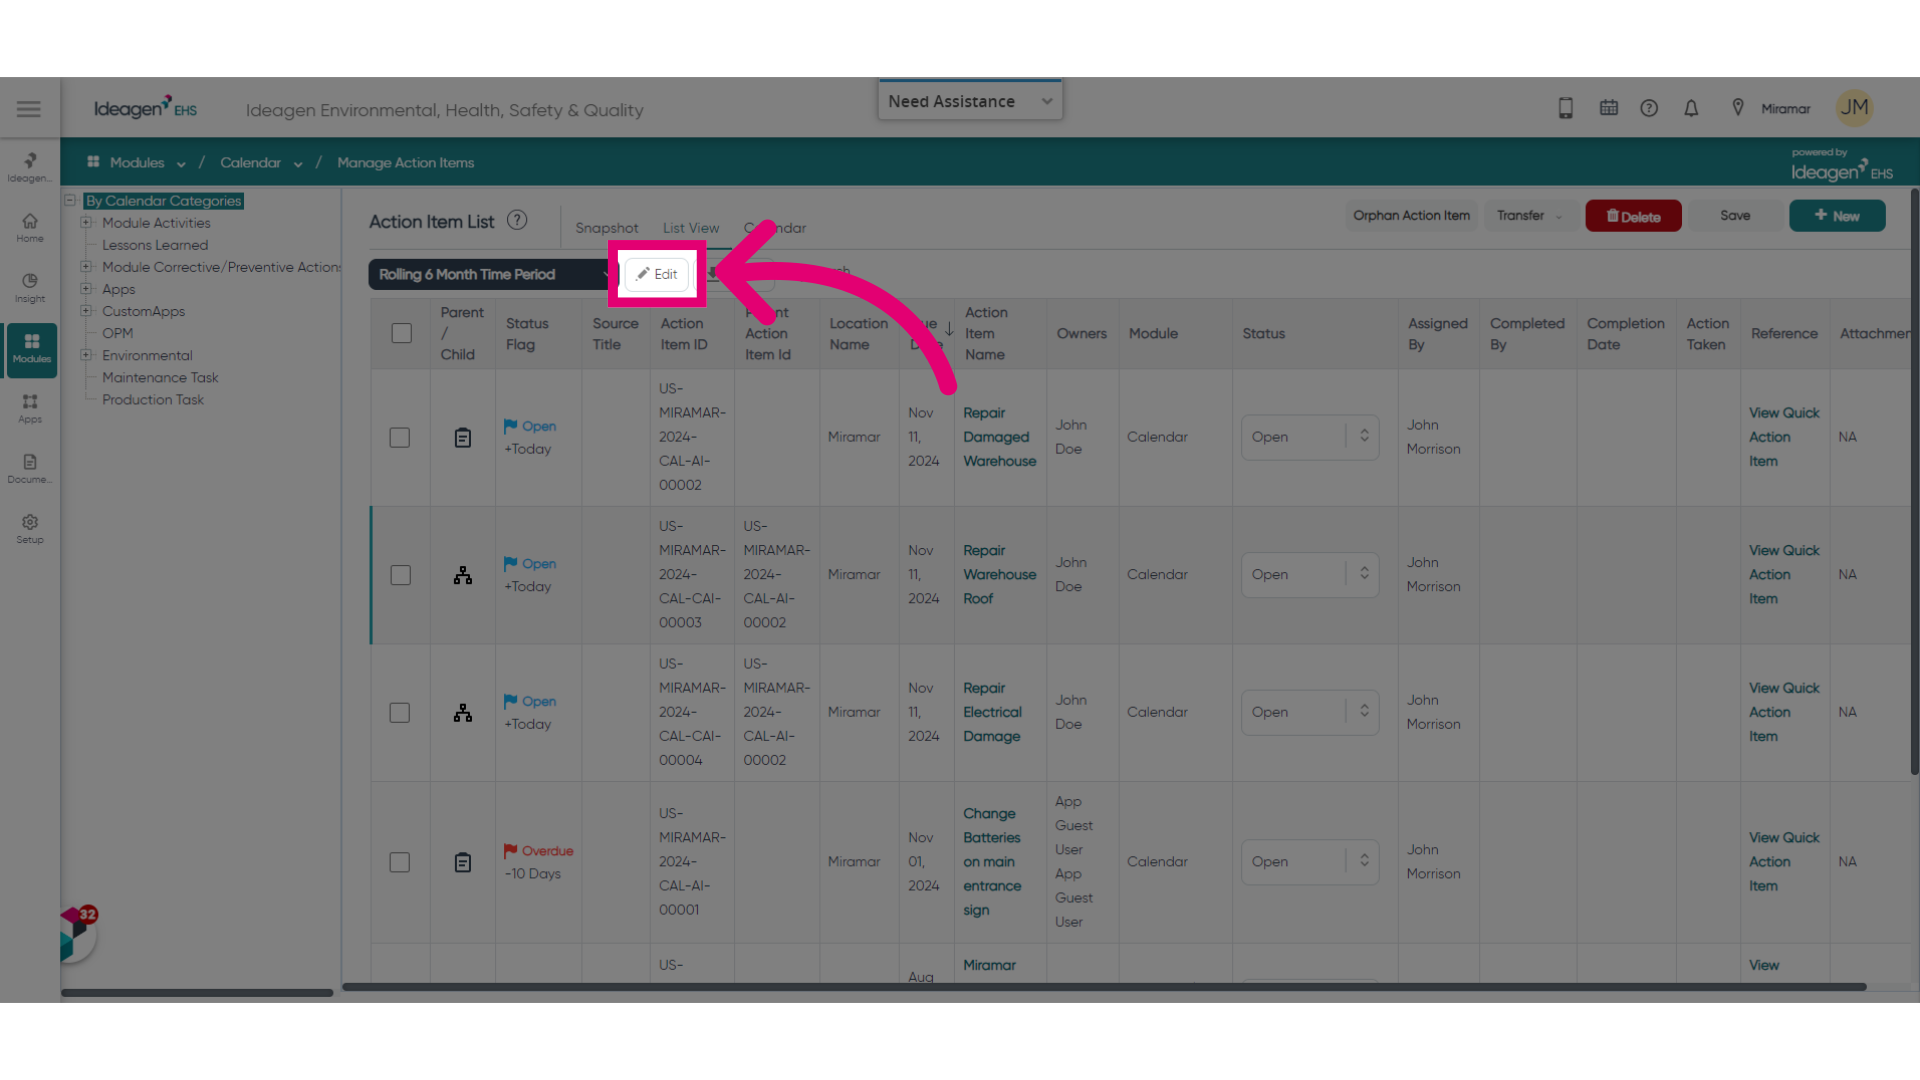
- Click Edit.
This will take you to the Manage View page.
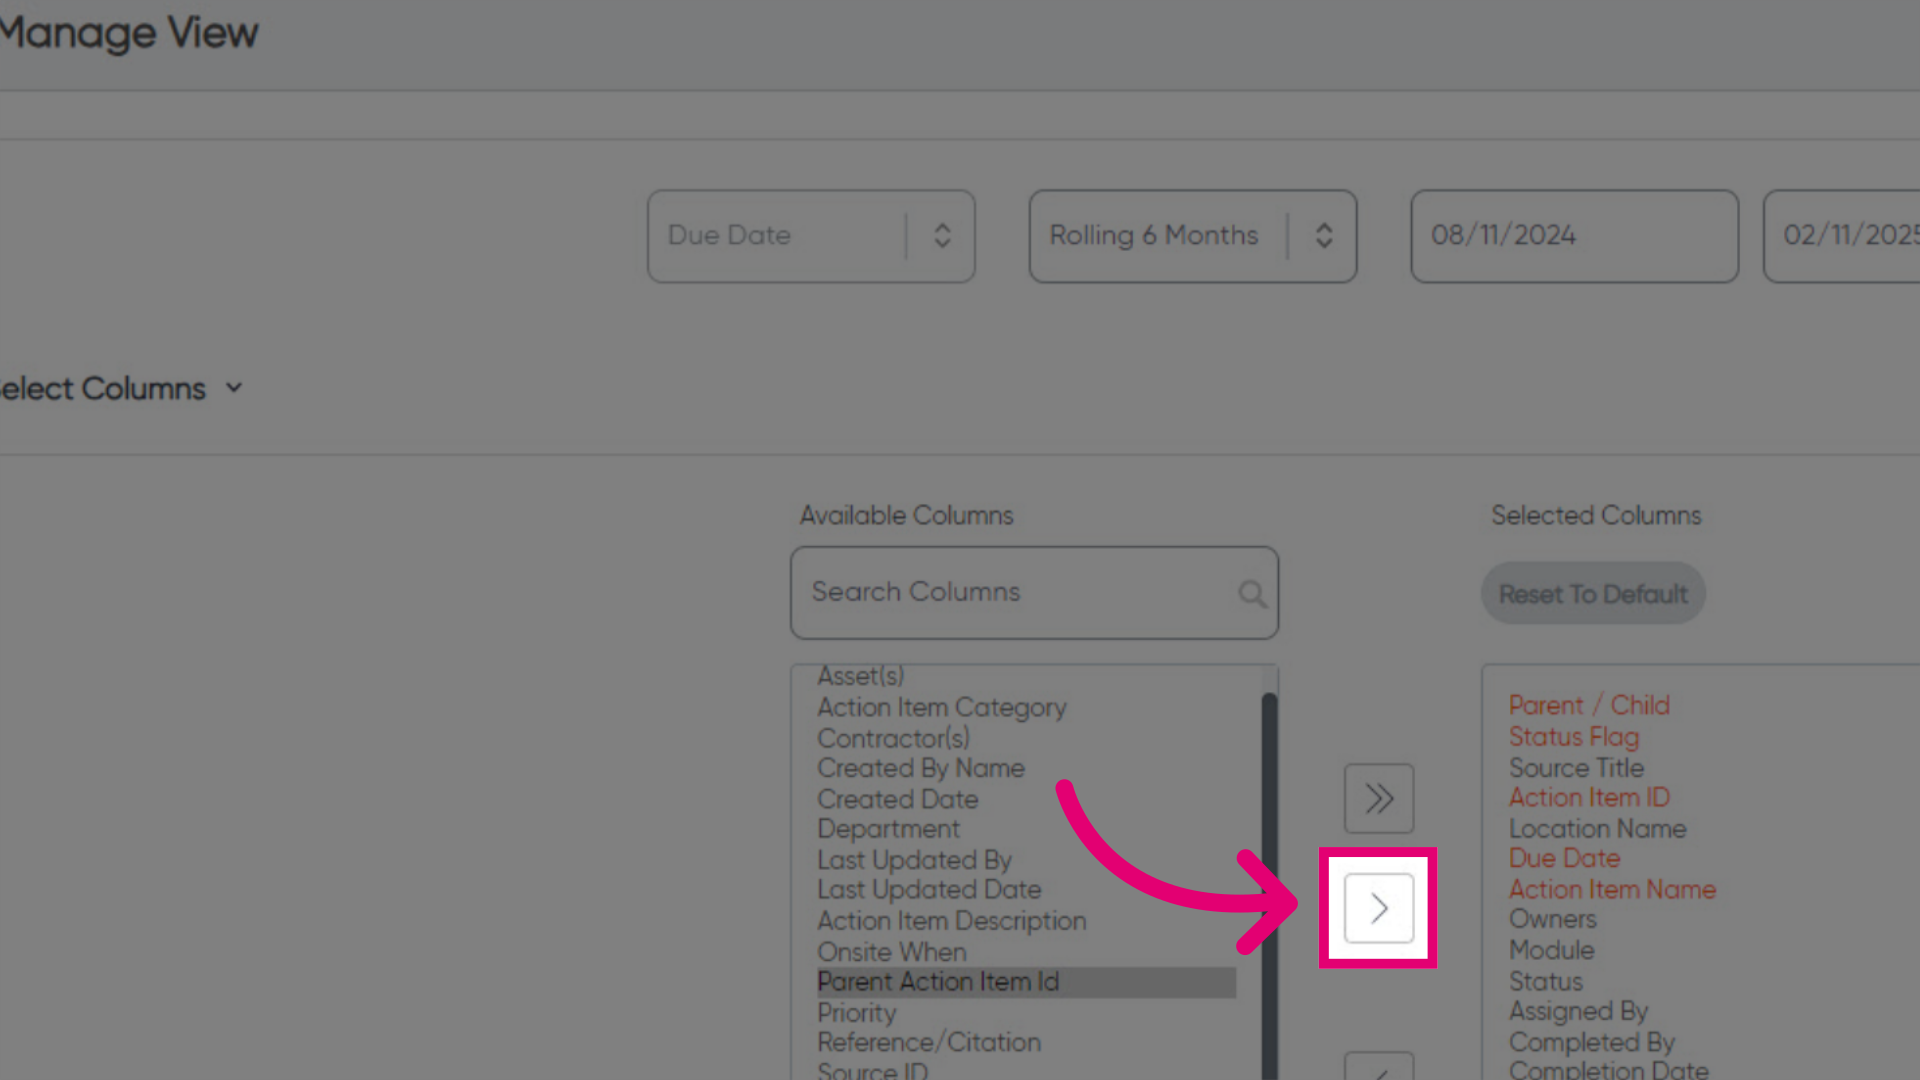
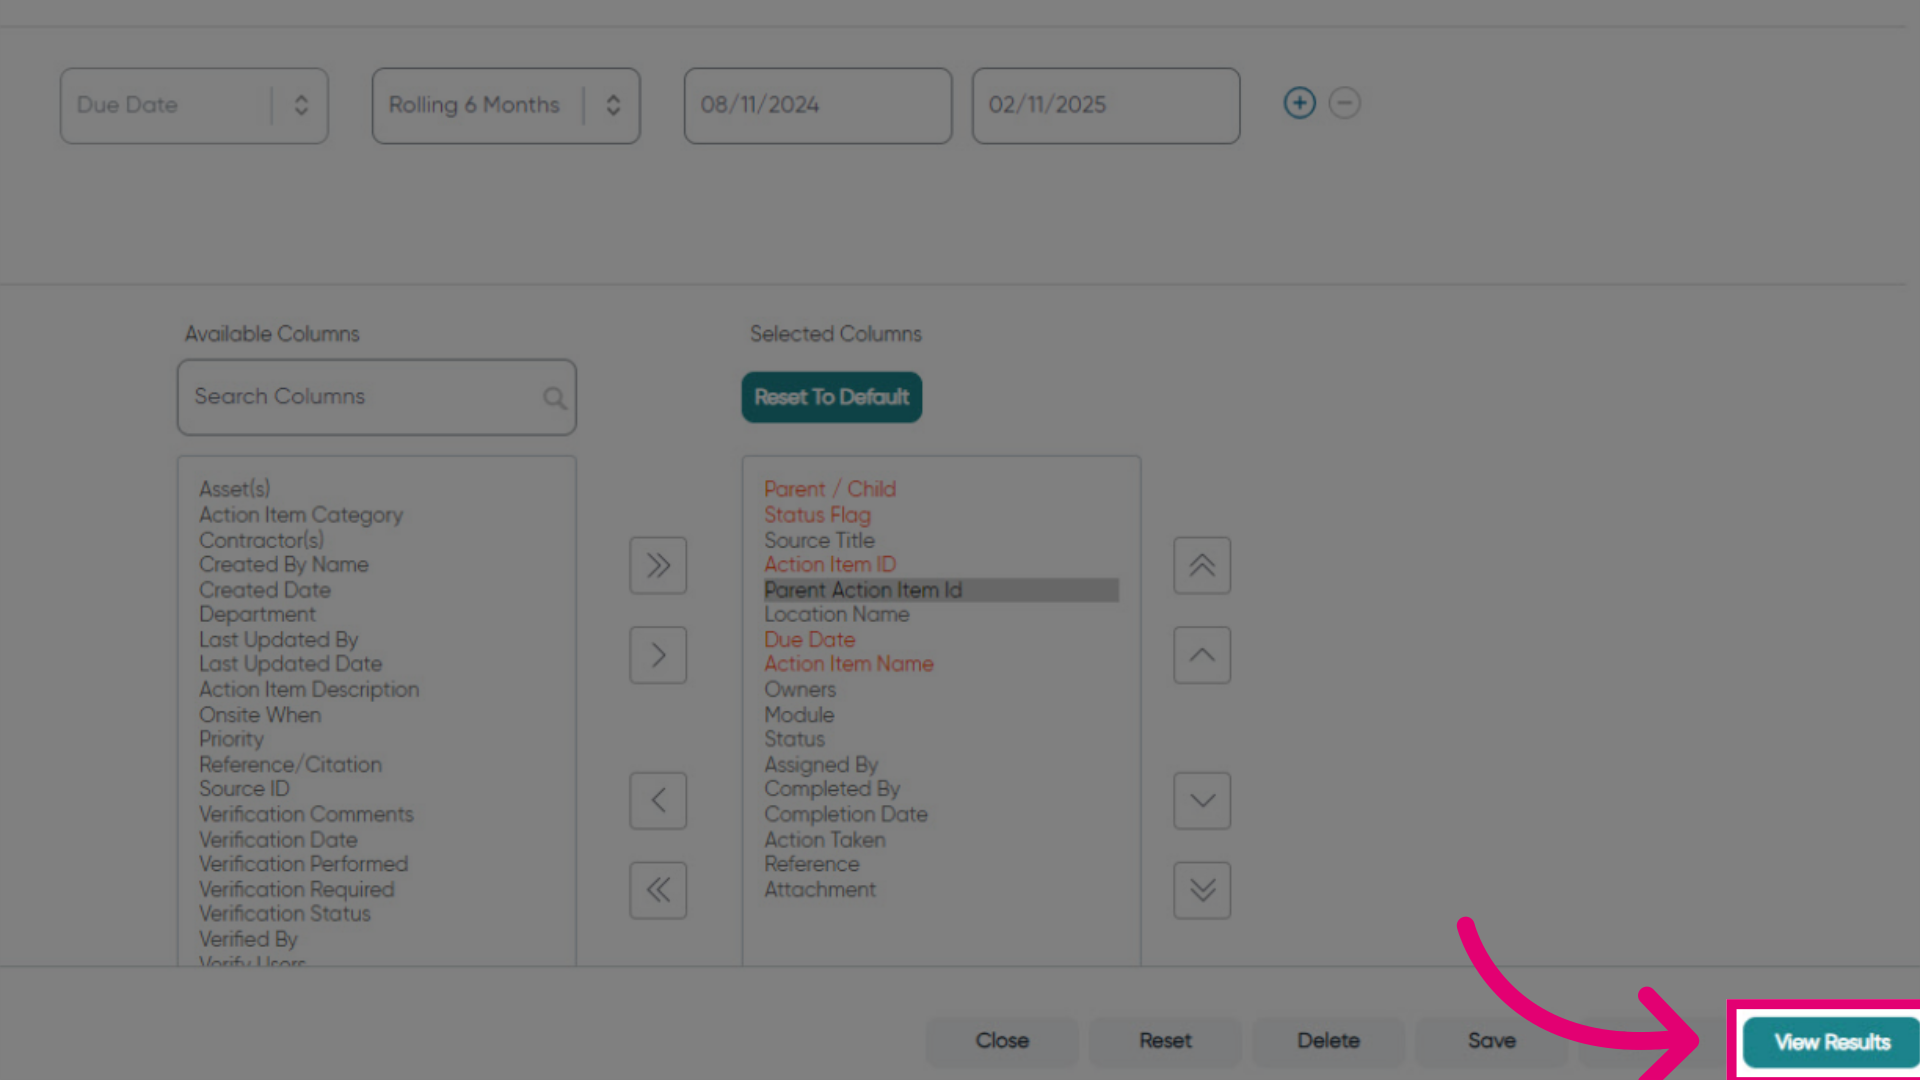
- Highlight the Parent Action Item ID.
- Use the Arrow button to move the item across.
- Reorder columns as needed using the Arrow buttons.
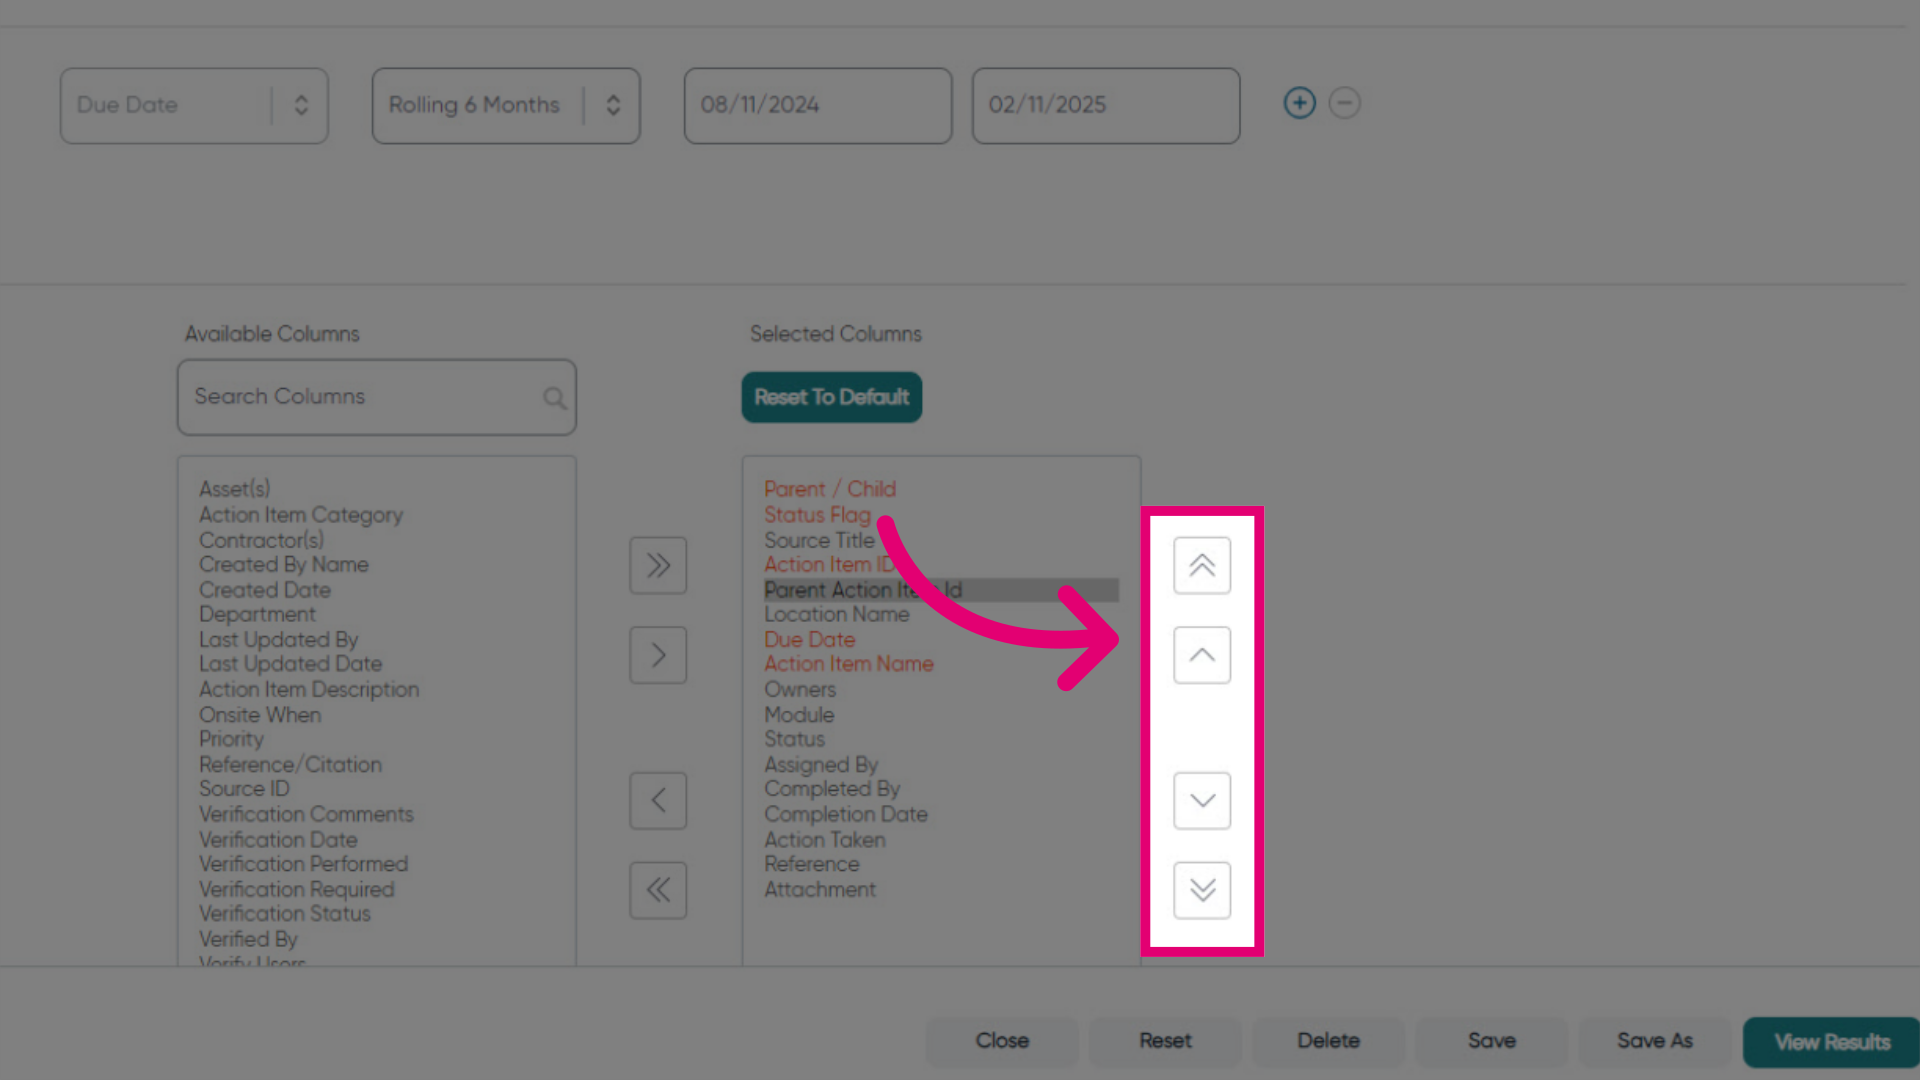
- Click View Results.
You will now see the Parent Action Item ID column on the Action Items List
